
Description: As of Canary version 2.2, you will be able to customise your the HTTP/HTTPS headers that are returned with your Canary when its Webserver module is enabled.
This feature will allow you to customise the headers of every response from your Canary's webserver module. Keep in mind that certain headers are instructive and will trigger certain behaviours from browsers (such as the headers required for HSTS compliance).
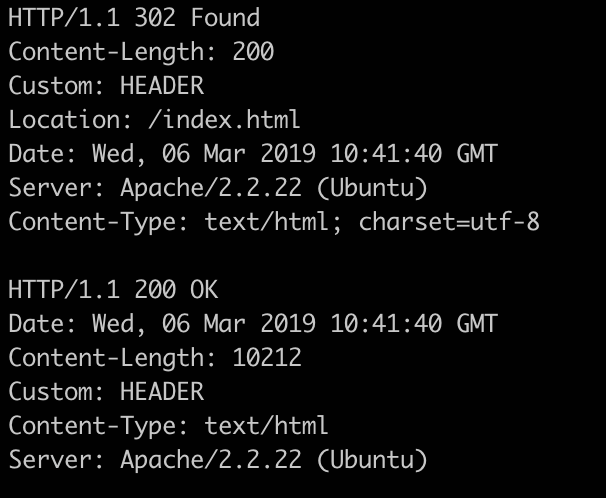
The below image shows an example of the Canary's webserver returning its usual headers for the Synology NAS Login profile but with a custom header (see if you can spot it!)
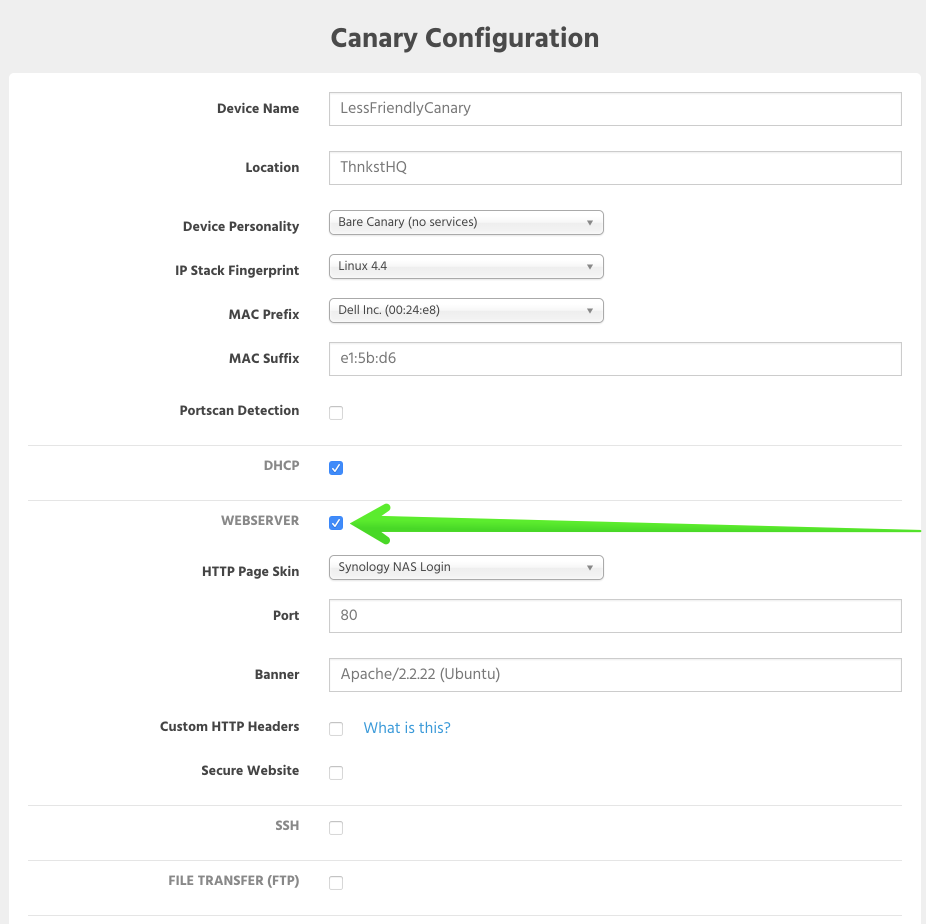
Step 1 : Enable Webserver on your Canary
Setting custom HTTP/HTTPS headers is possible both by the remote Console or the local Bluetooth configuration mode. In both cases you need to enable the Webserver module on your Canary.
Step 2 : Enable Custom HTTP headers
Enable the "Custom HTTP Headers" checkbox:
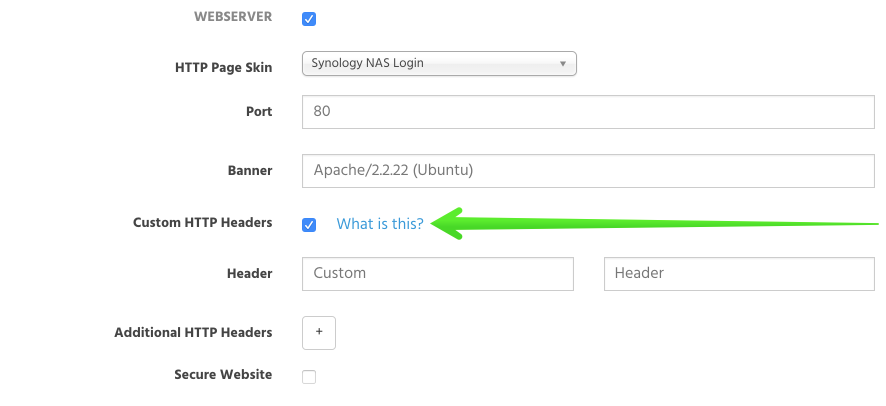
There are two input areas available which allow you to insert your HTTP header key and the corresponding HTTP header value.
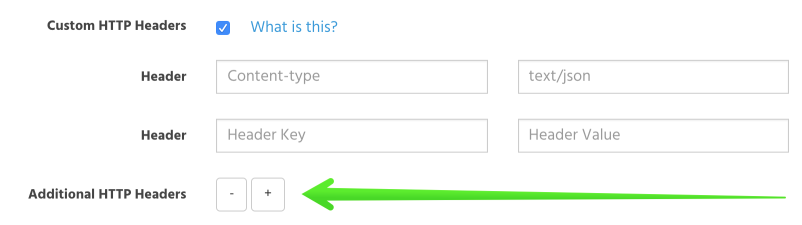
Step 3 : Add more Custom HTTP headers
By clicking on the [+] button you can add further custom HTTP headers. Remove them with the [-] button.
Step 4 : Follow the same process for HTTPS
You can follow the exact same process as above to enable and set custom HTTP headers for your HTTPS webserver too.