Enable Single SignOn from Onelogin to your Canary Console with these steps.
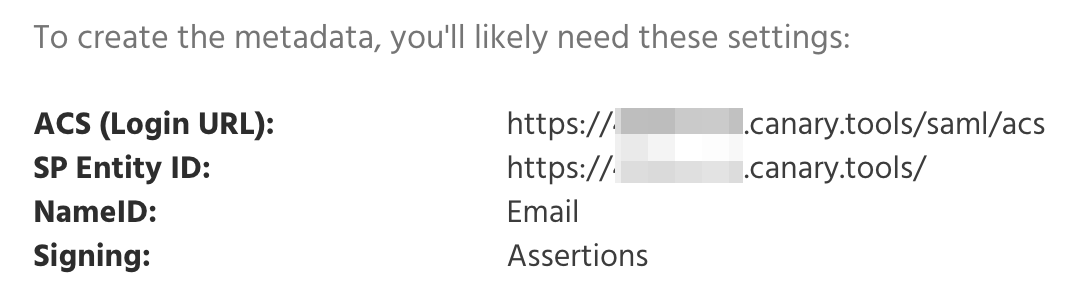
Step 1: Retrieve SAML Parameters from Your Canary Console
Login to your Console, click Setup on the top navbar, then SAML on the left menu:
Step 2: Access OneLogin Administration Panel
Log in to Onelogin and click Administration to get to the administration page.

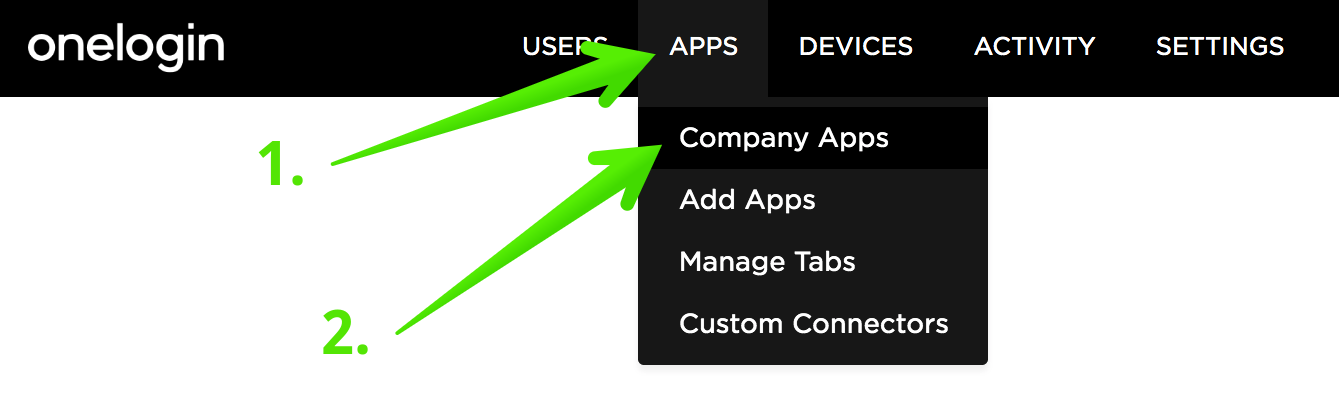
Step 3: Navigate to the Applications Page
Load the Apps page by Clicking Apps, then Company Apps:
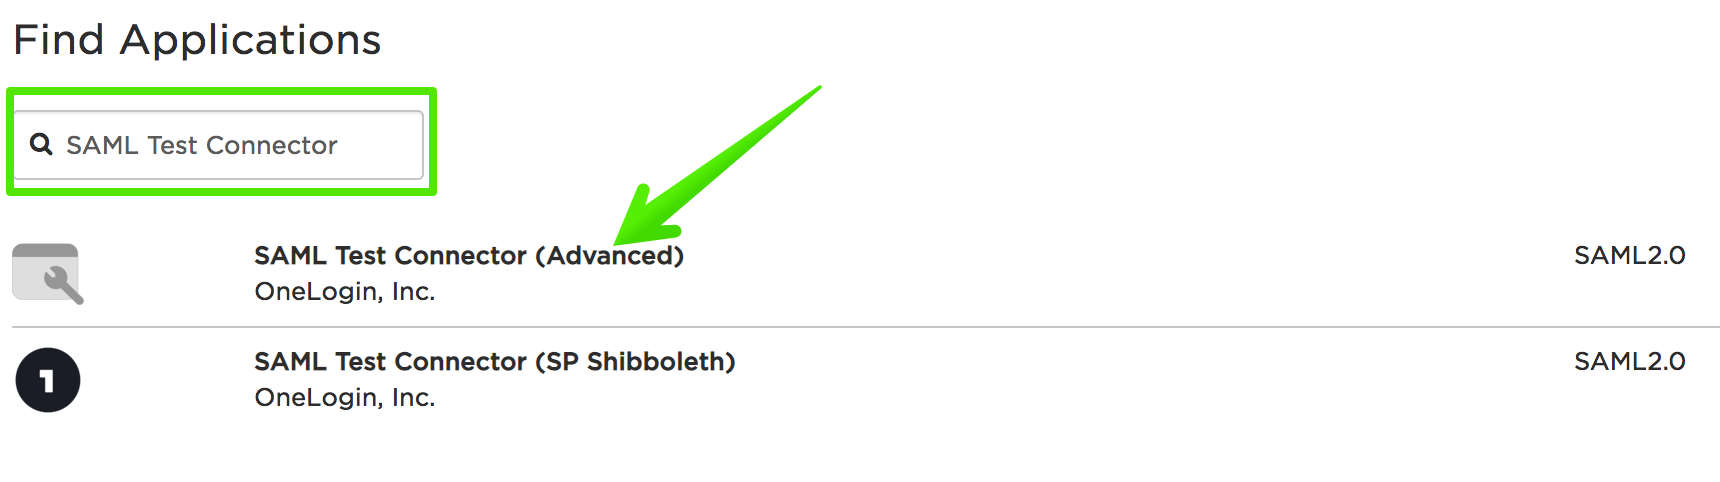
Step 4: Add the "SAML Test Connector (Advanced)" Application
Click Add App:

Search for SAML Test Connector, and click on SAML Test Connector (Advanced):
Step 5: Enter SAML details
Choose a name for your Onelogin Canary application and click Save.
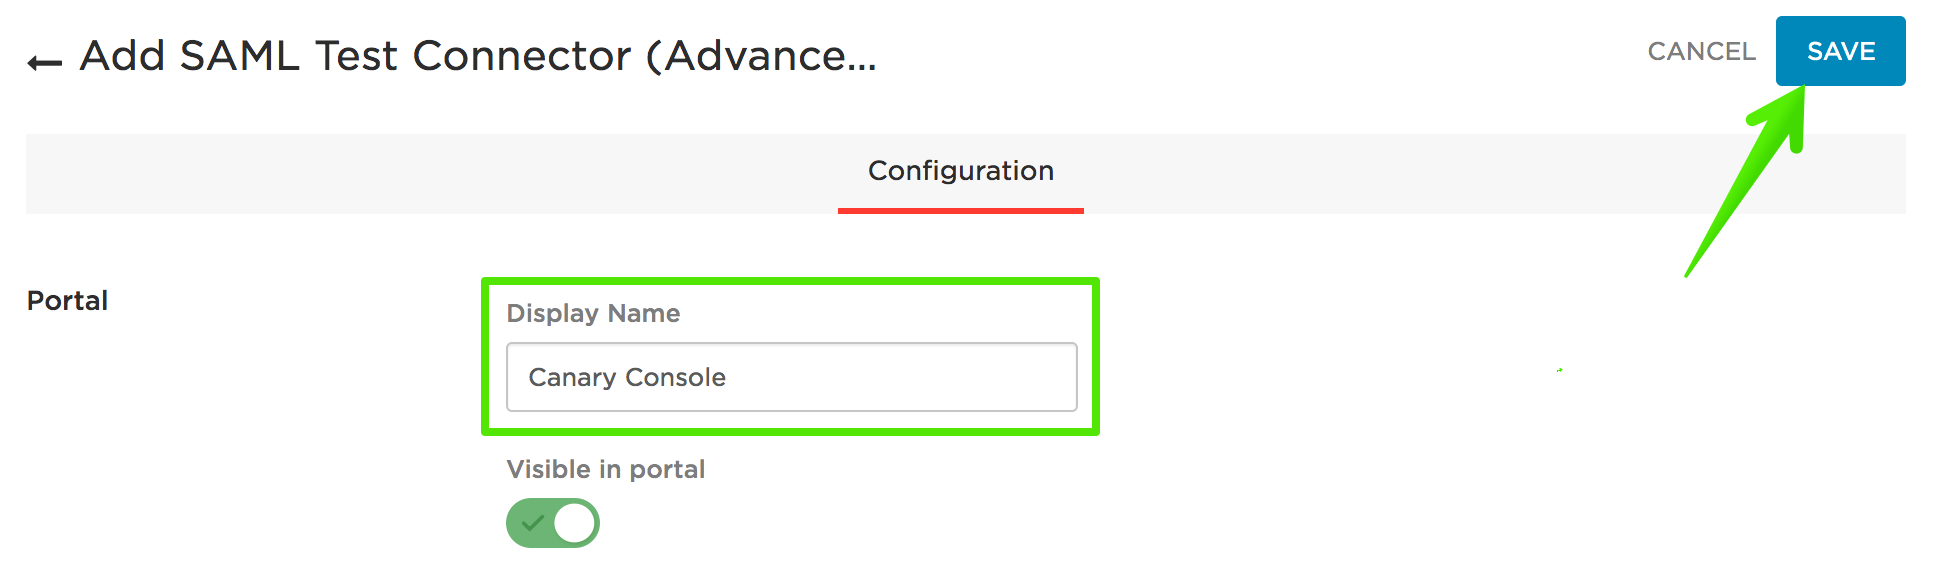
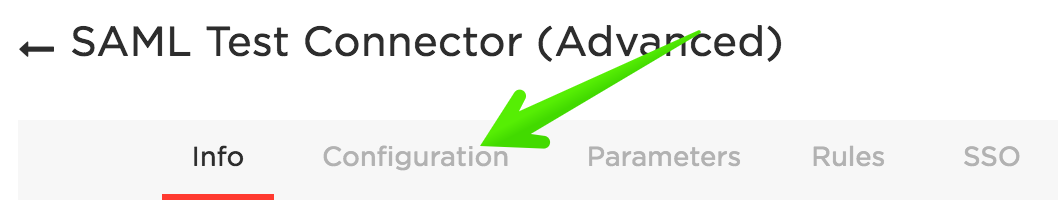
Then click on the Configuration tab:
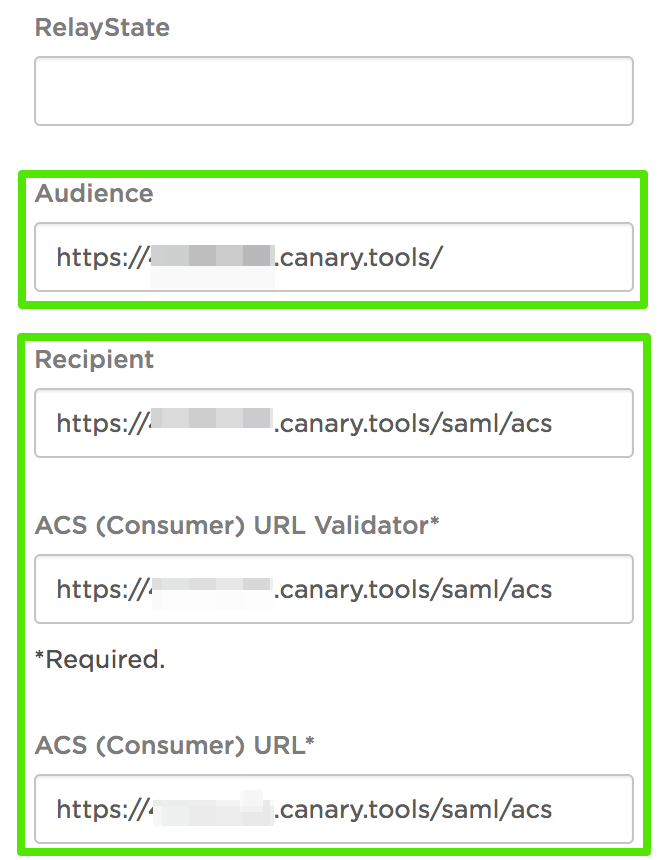
In the Audience field: Paste your Entity ID from Step 1 (don't forget the trailing forward slash).
In the Recipient, ACS URL Validator, and ACS URL fields: Paste your ACS URL from Step 1.
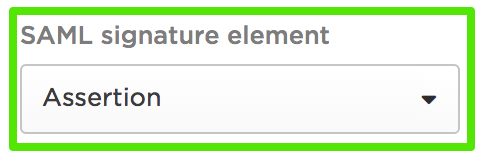
Scroll down to the SAML signature element, and make sure Assertion is selected:
Lastly, click Save:

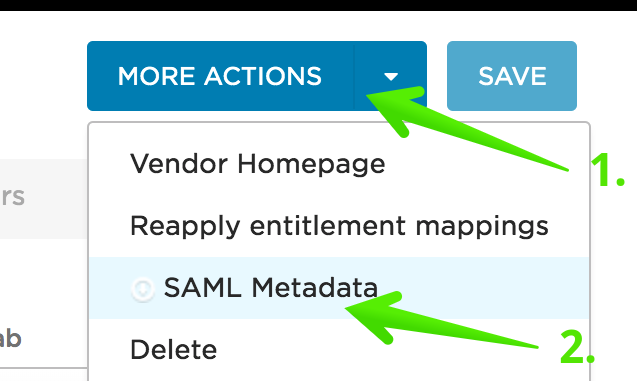
Step 6: Download SAML Metadata
Click More actions, then SAML Metadata:
Step 7: Assign Permissions for the Canary Application in OneLogin
Almost there! You may need to assign or grant permissions to use the Canary Console app, depending on your Onelogin setup:
Your Onelogin configuration is done!
Step 8: Send us the SAML Metadata
Send the SAML metadata file from Step 6 to us in a support ticket here and we will configure your Console with the IdP metadata and confirm when SAML support is fully set up.
Step 9: Test login from both the Console and Onelogin
You'll know it's working when you see your Console Login page show a Login with SSO button:
Click the button to initiate the SSO login.
You'll also be able to login to your Console by clicking on your Canary app panel inside the Onelogin dashboard: