Enable Single Sign-On from Azure Active Directory to your Canary Console with these steps.
Step 1: Log in to your Canary Console
Log in to your Console, click Global Settings on the top right-hand side navbar drop-down.
Then click on SAML on the left menu.
Step 2: Log in to Azure Active Directory and add a new SAML Application
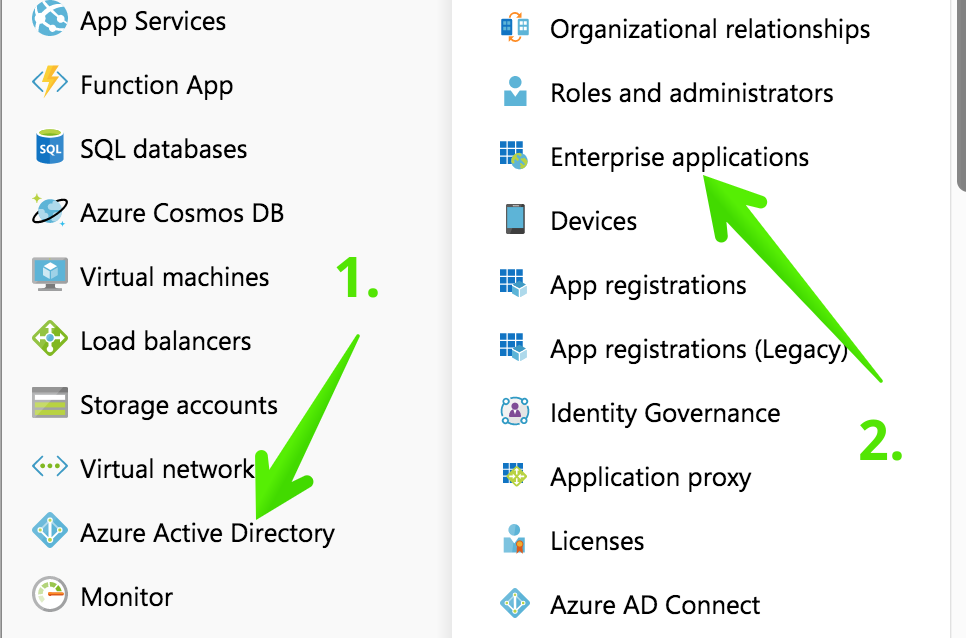
In your Azure dashboard, click Azure Active Directory, then Enterprise applications.
Then click New Application.

Next, select Create your own application.
Give your application a name and click Create.
Step 3: Configure SAML for the Canary Console
Click Single sign-on in the left menu, then click on the SAML panel.
Edit the Basic SAML Configuration information.
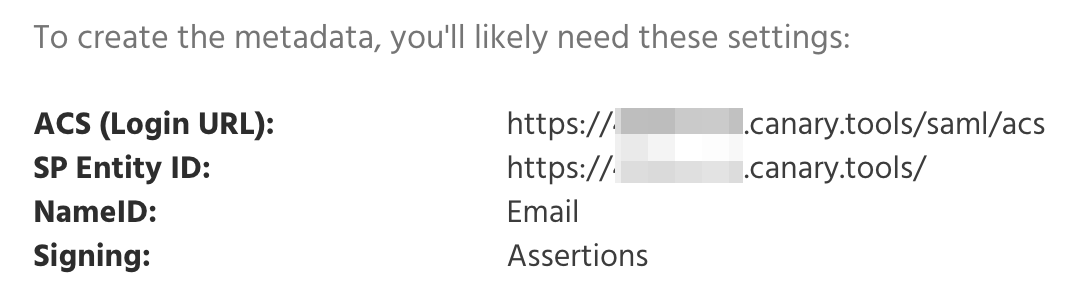
In the Identity field, paste the Entity ID from Step 1. In the Reply URL field, paste the ACS URL from Step 1. Finally, click Save.
Click the Save button to continue.
Step 4: Edit User Attributes & Claims
On the User Attributes & Claims panel, click the Edit link.
Edit the Required Claim.
Set the Name identifier format to Email address.
Edit the Source attribute field so that it contains user.mail, and click Save.
Remove any Additional claims:
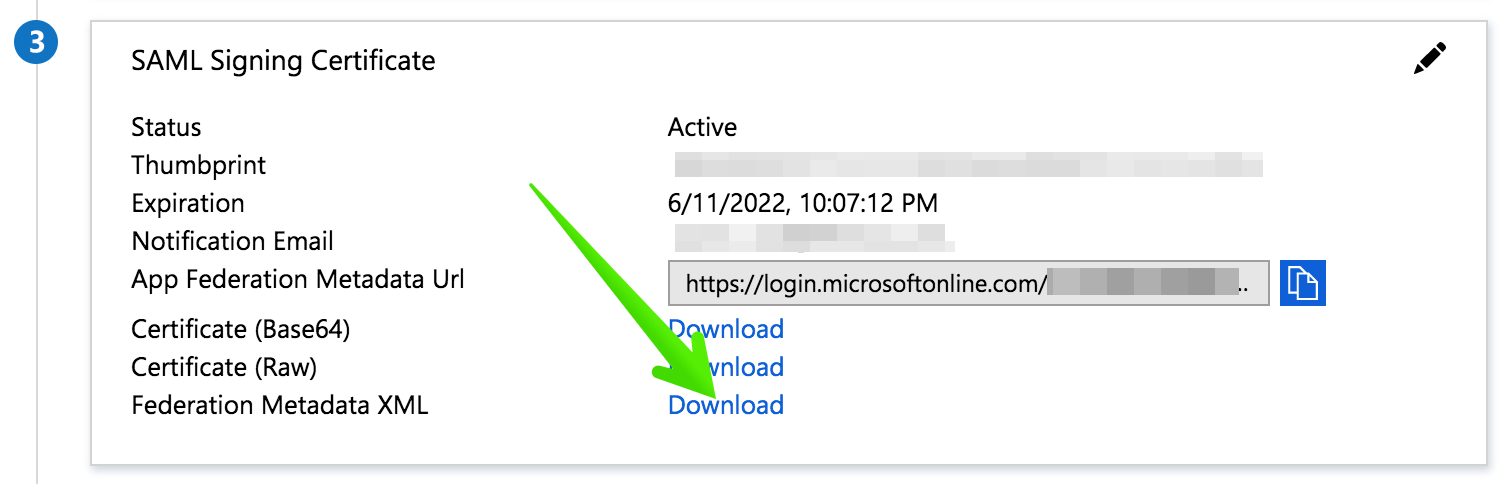
Step 5: Download the SAML Metadata
Look for the Federation Metadata XML download link and click it.
Step 6: Assign users or groups to the Canary Application
Almost there! The last step is to grant Canary Console permission to your Azure AD users.
Click Users and groups, then Add user.

Add users and groups until you're happy.
Your Azure Active Directory configuration is done!
Step 7: Send us the SAML Metadata
Send the SAML metadata file from Step 5 to us in a support ticket here, and we will configure your Console with the IdP metadata and confirm when SAML support is fully set up.
Step 8: Test login from both the Console and Azure MyApps
You'll know it's working when you see your Console Login page show a Login with SSO button.
Click the button to initiate the SSO login.
You'll also be able to log in to your Console by clicking on your Canary app panel inside the MyApps Azure dashboard: