Canaries aren't just Hardware devices. You can run Canaries inside your EC2 Cloud infrastructure, using the same Console as the rest of your Canary fleet.
Keep in mind:
- Like other Cloud Canaries, a registered but offline Cloud Canary will still occupy a license. If you've terminated a bird on EC2, don't forget to decommission it on your Canary Console too.
Follow the steps below to create your EC2 Cloud Canary:
Step 1: Sign in to your Console
You can log in to your Console.
Step 2: Start adding a new Canary
Click the + Add icon and click Add New Canary.
Step 3: Select EC2 Canary
Click Add EC2 Canary.
Step 4: Launch in your chosen AWS region
Click Launch on the AWS region you want to deploy your Canary.
Note
If the account/region is not available on your Console, please see our guide here.
Step 5: Sign in to your AWS account
You will be taken to your AWS account, where you will need to Sign In.
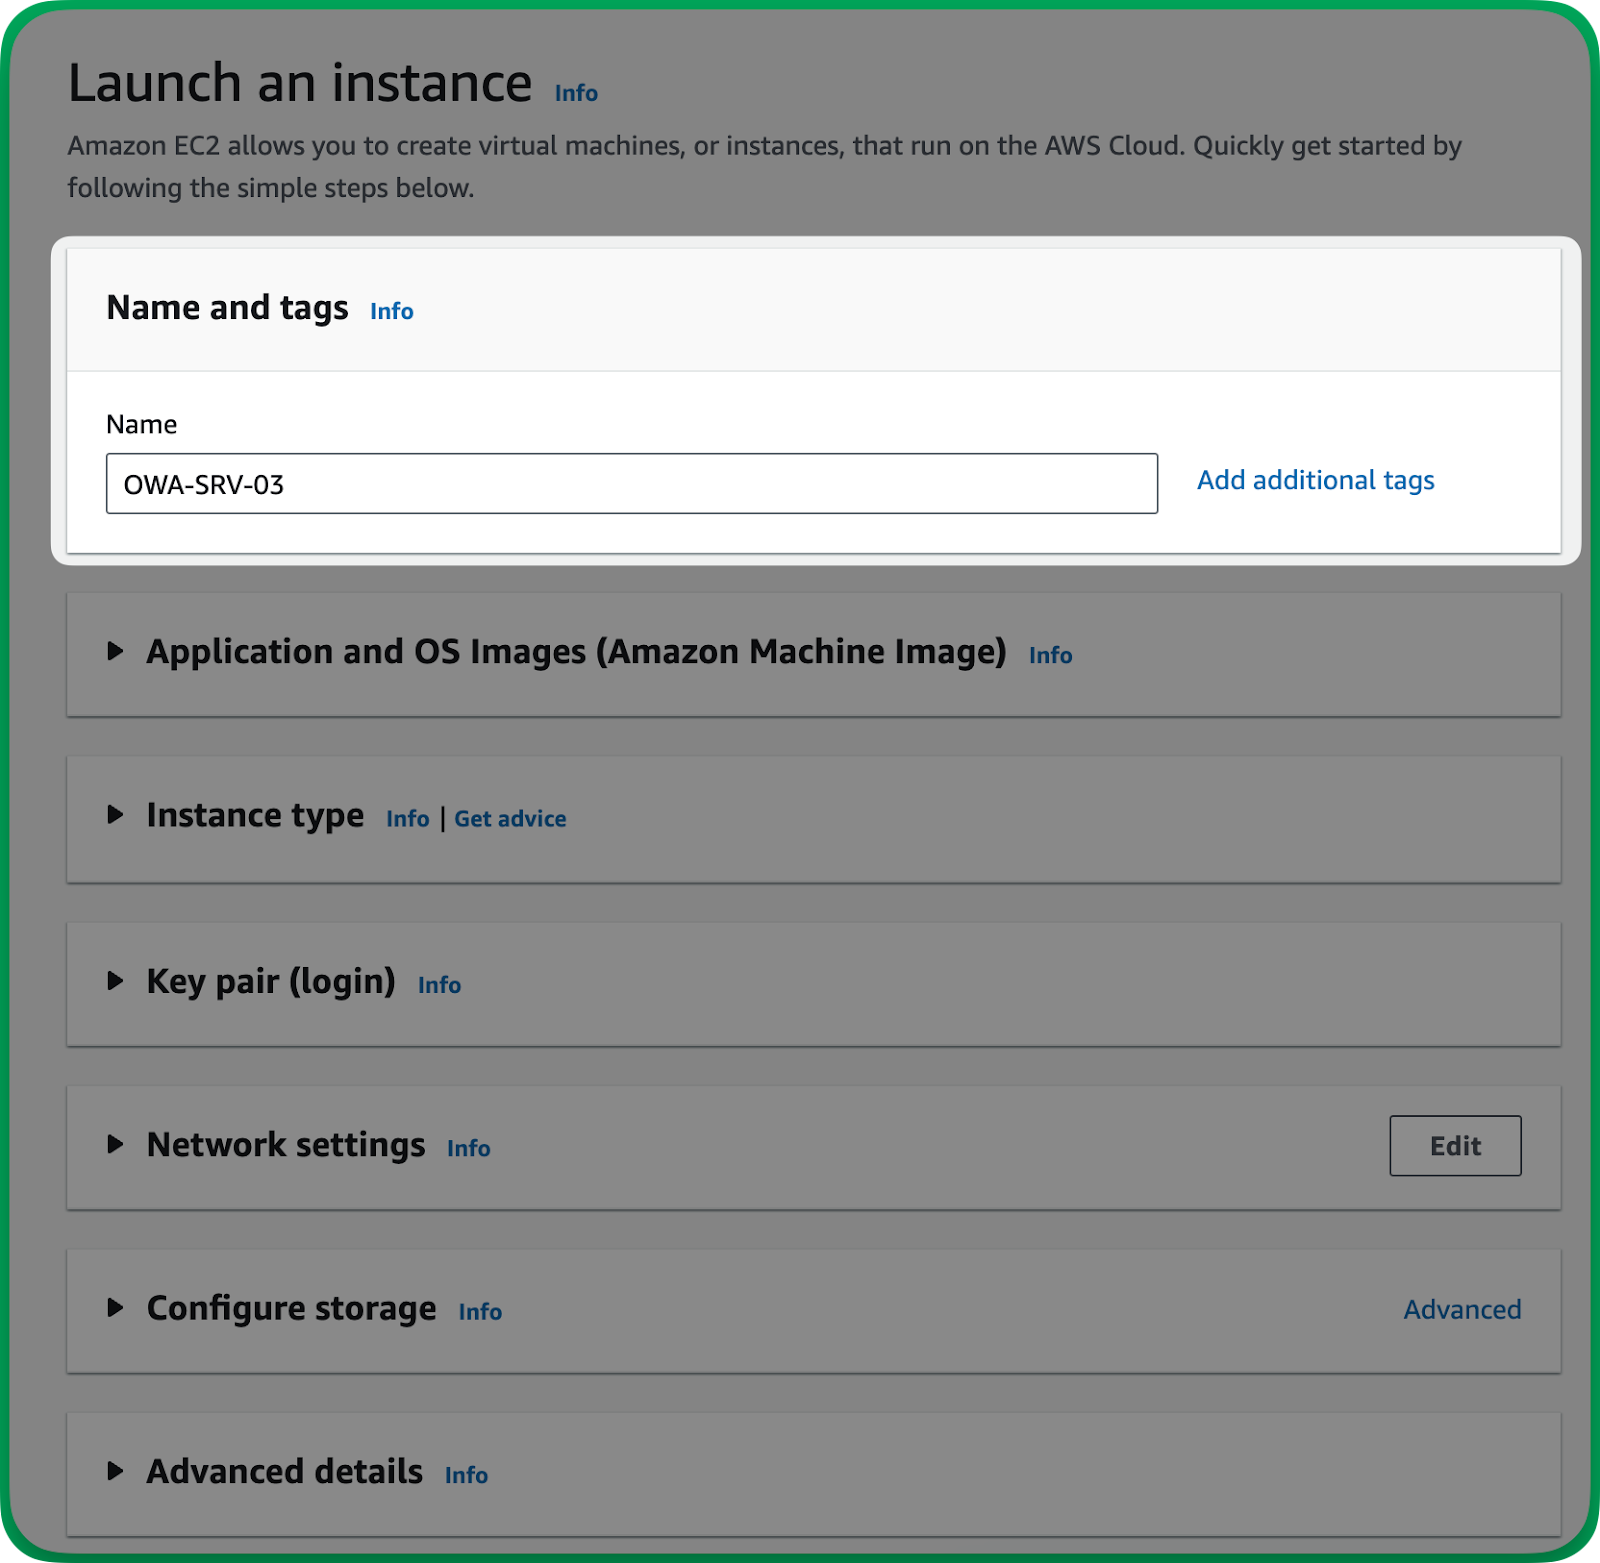
Step 6: Name your Canary instance
Name your Canary. We've named our Canary OWA-SRV-03.
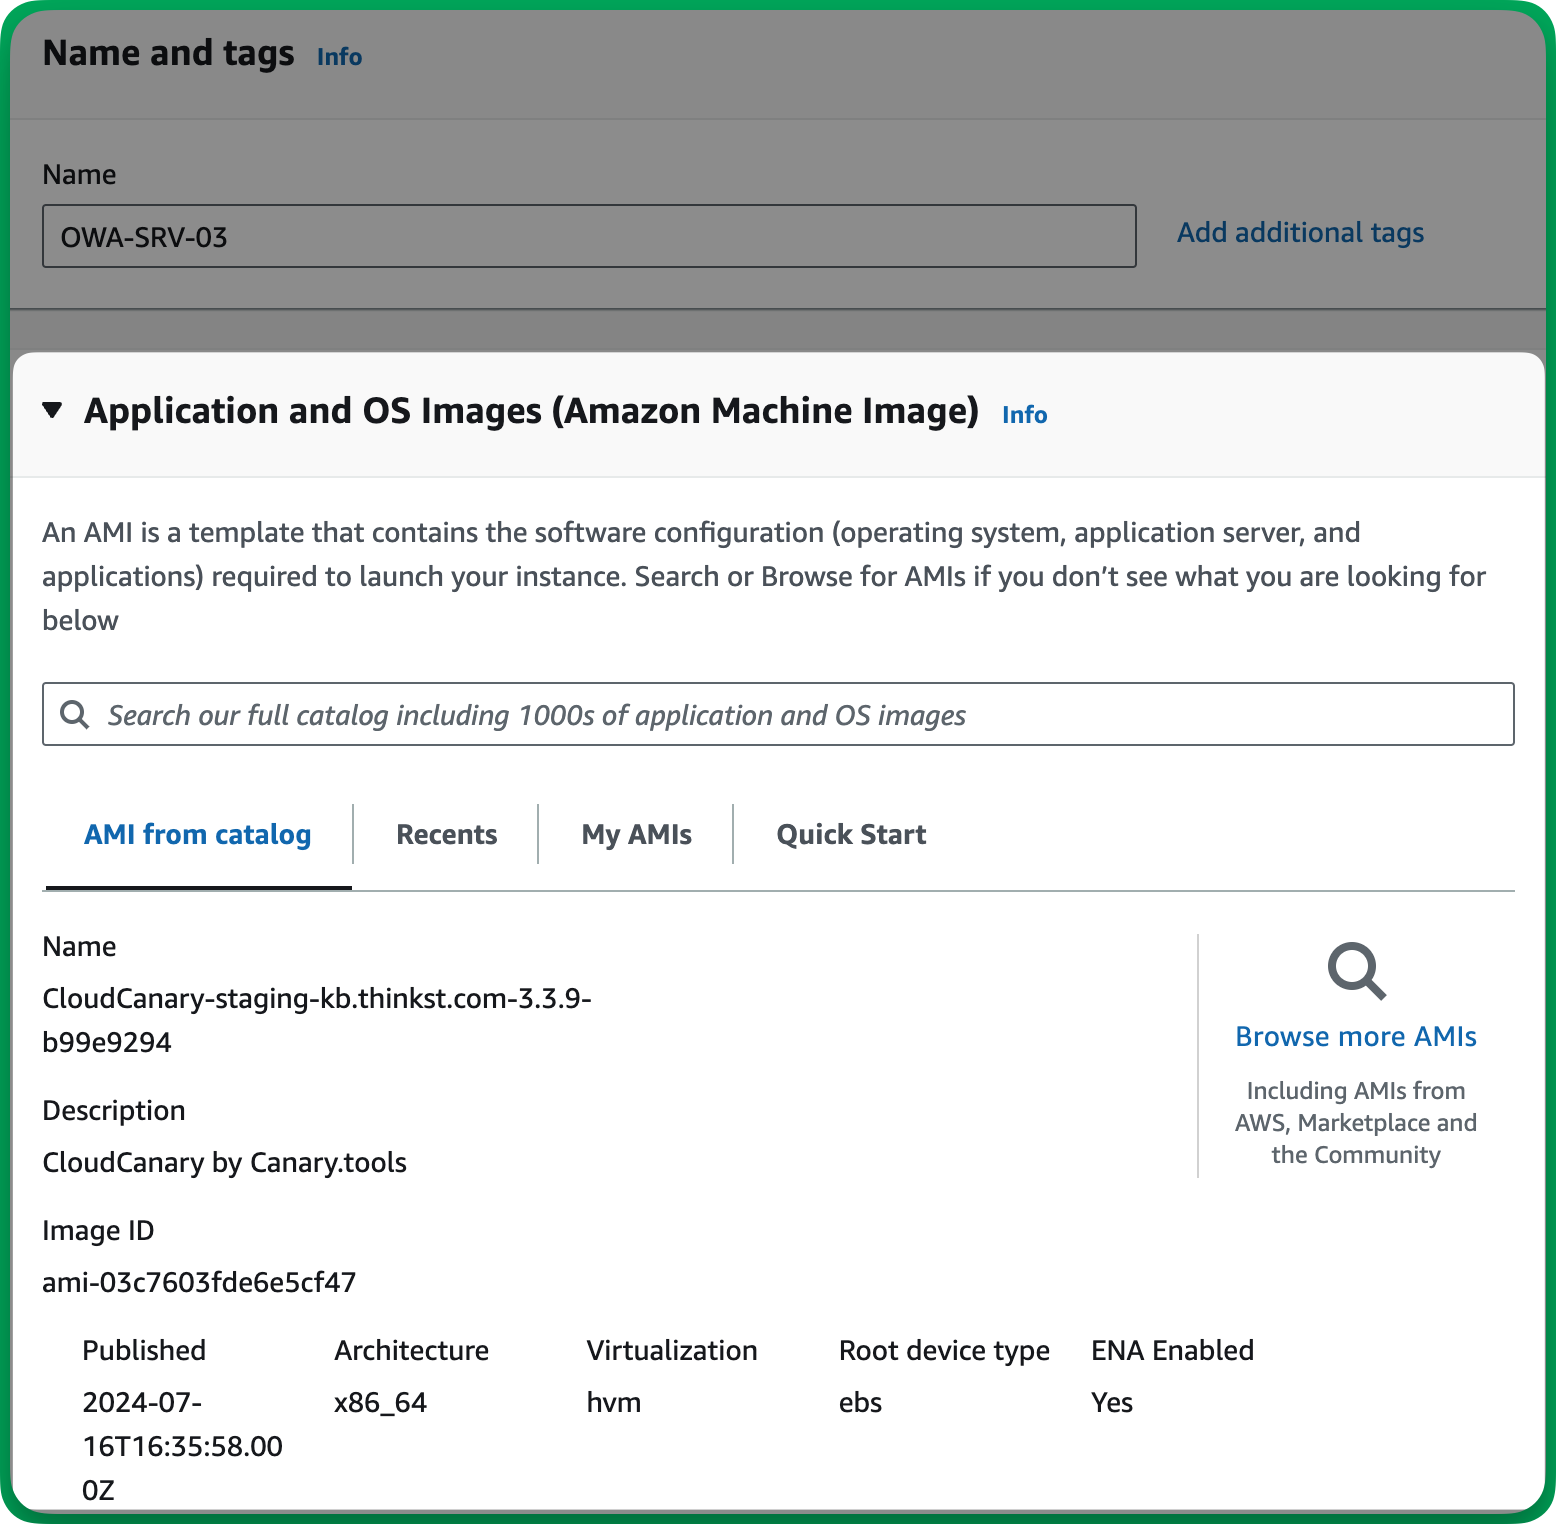
Step 7: Review preconfigured image and settings
We will automatically configure the Application and OS image, Instance type and storage.
There are some additional details on the AMI we've shared with your AWS account/region.
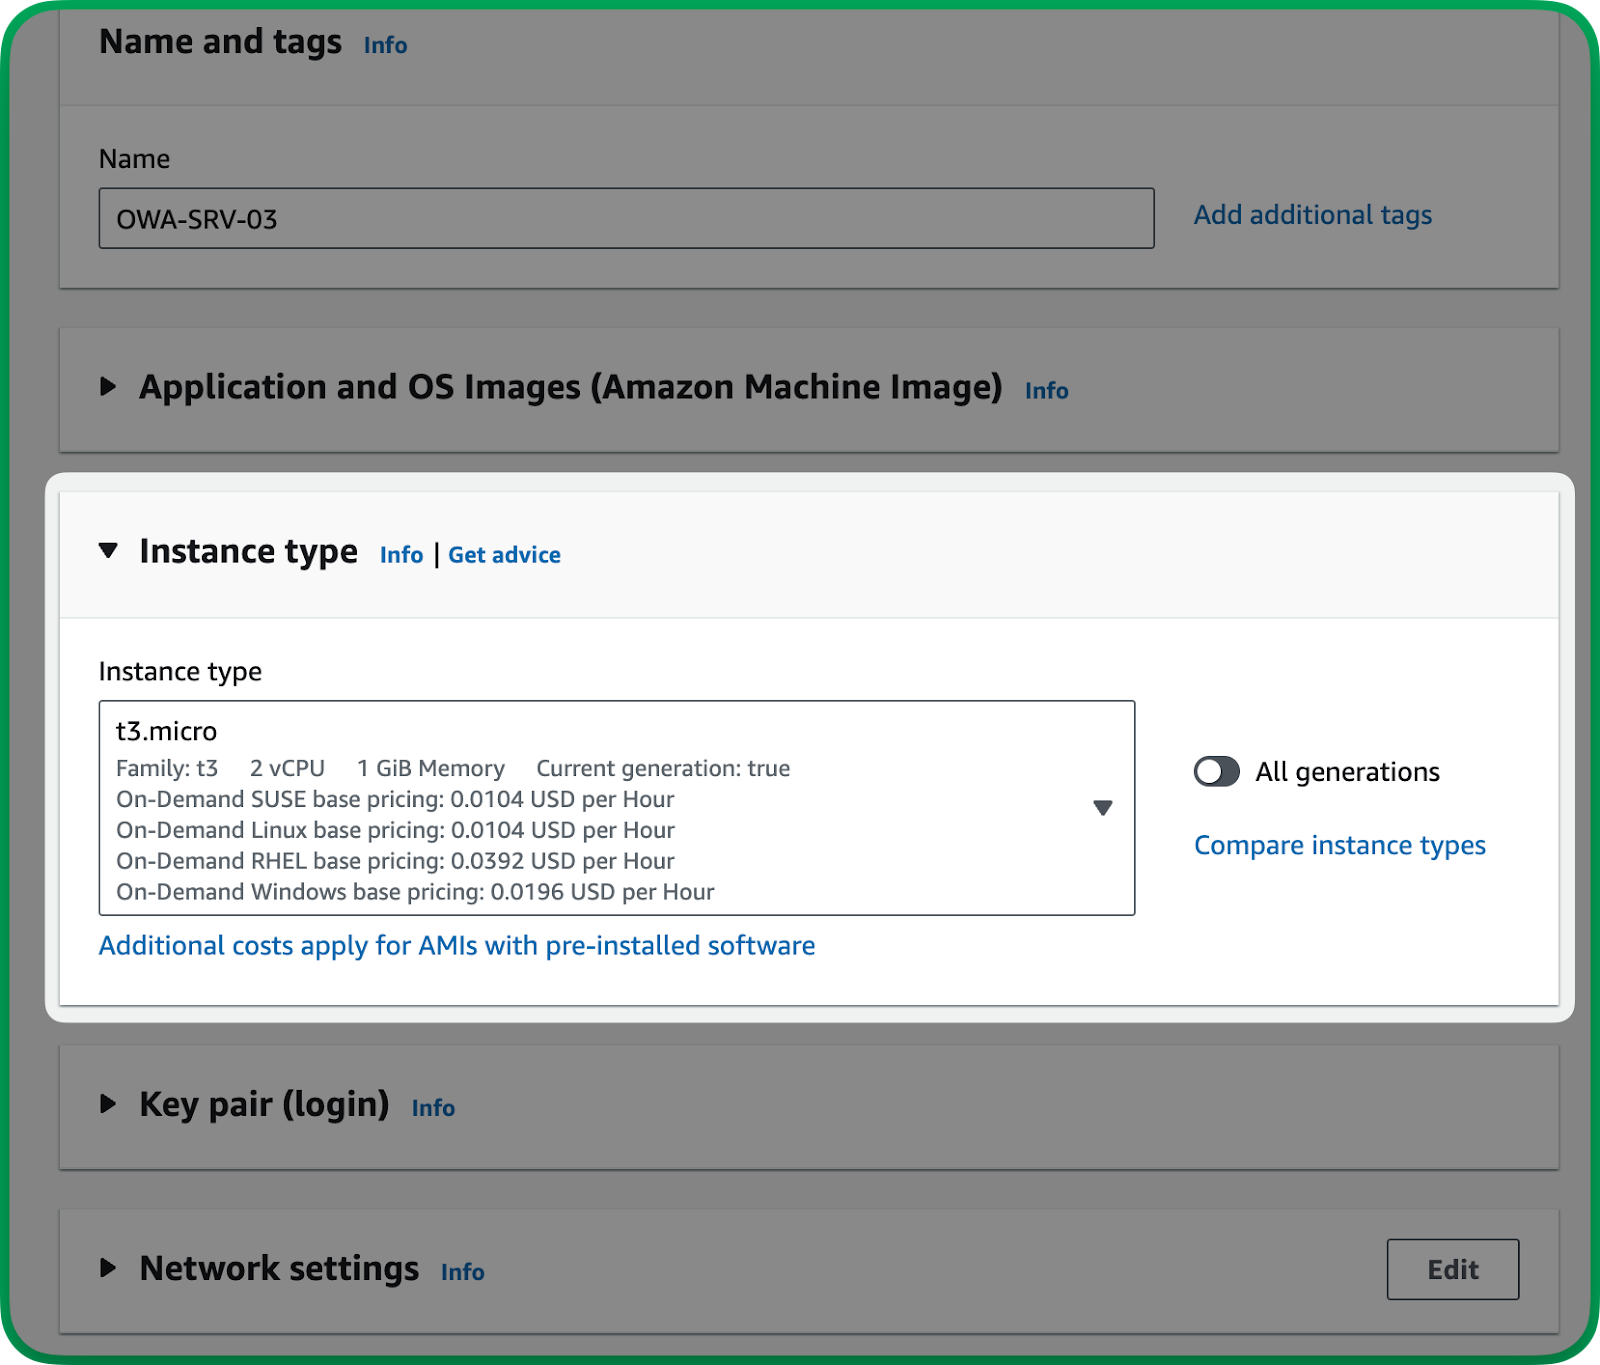
Step 8: Confirm the t3.micro instance type
The t3.micro instance size is automatically selected.
The AWS Canary is super lightweight, and the t3.micro instance size is all we need.
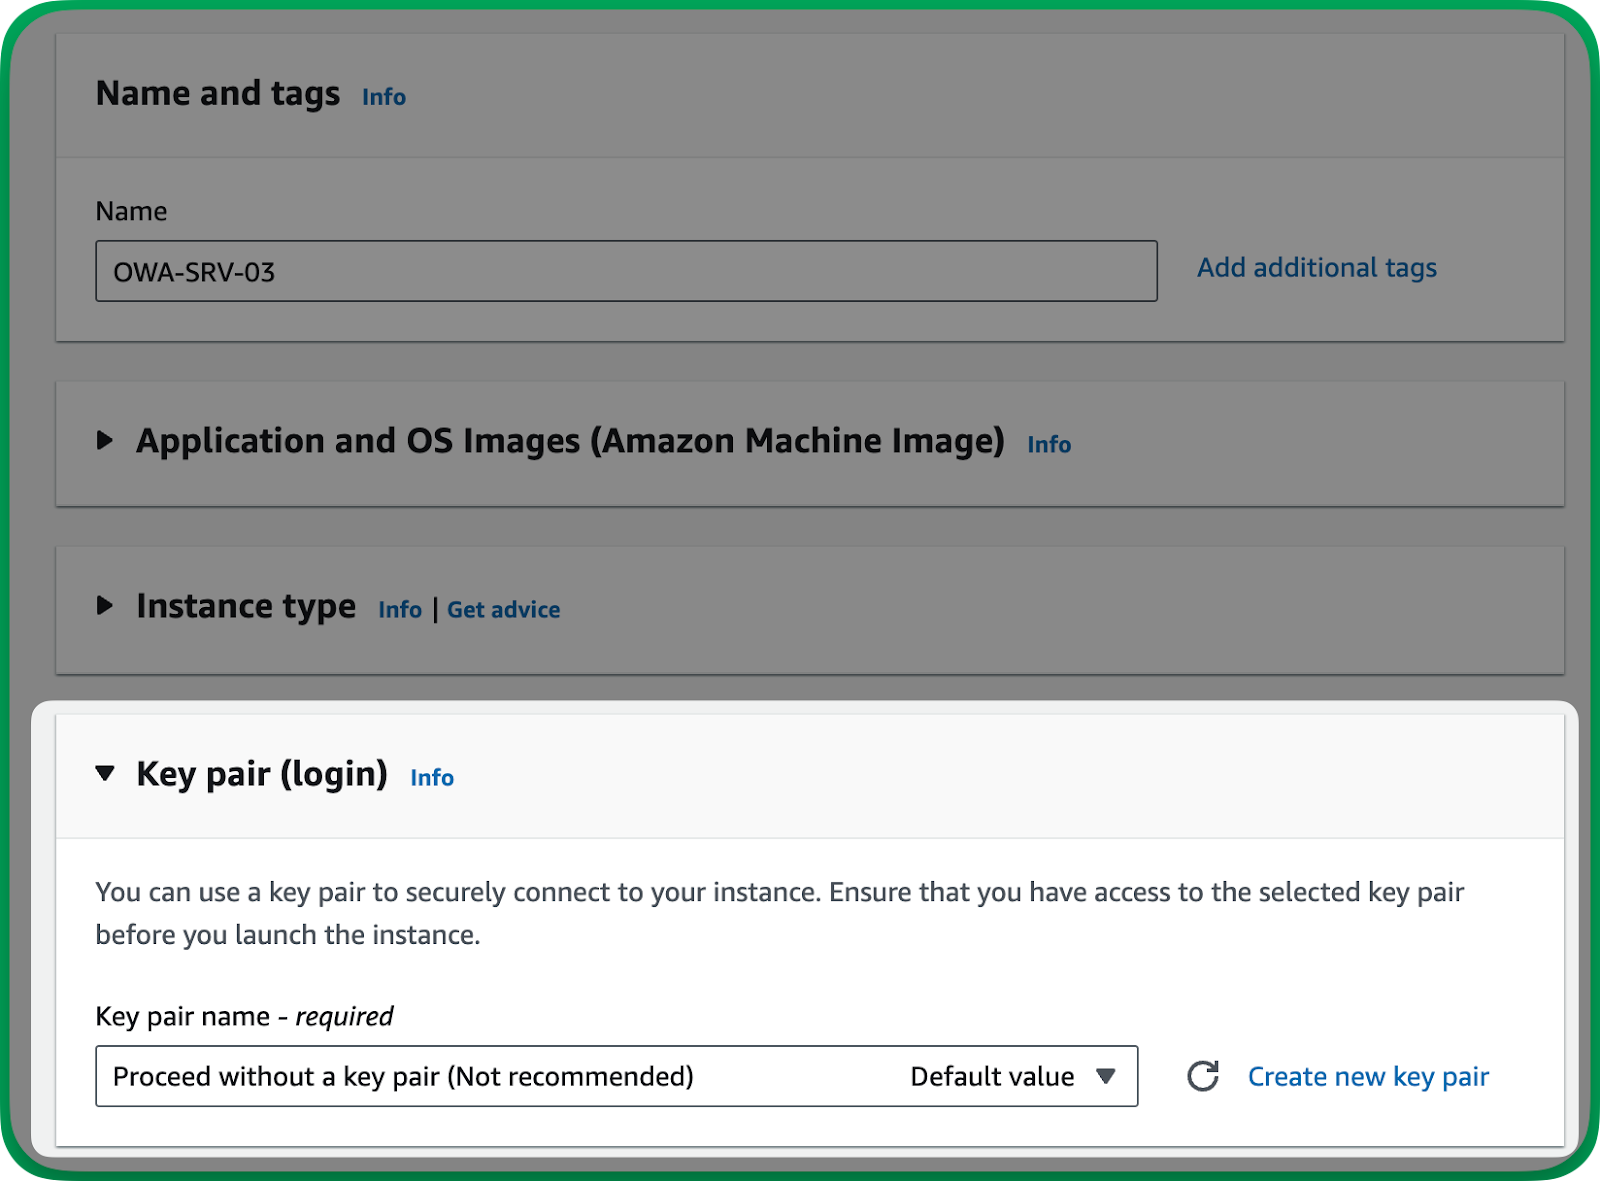
Step 9: Choose key pair option (proceed without key pair)
Select Proceed without a key pair from the drop-down.
Note
We select to proceed without a key pair here as there is no way to log in and remotely manage this Canary from within AWS. All configuration is done from your Canary Console once the Canary is online.
Step 10: Configure networking and security
- Select the network you want to run your Canary on.
- Select the subnet you want to run your Canary on.
- Disable public IP — Exposing your instance to the public internet will produce a lot of noise.
- Set up the security accordingly — The security group you select should allow traffic for the specific services you intend to run on your Canary.
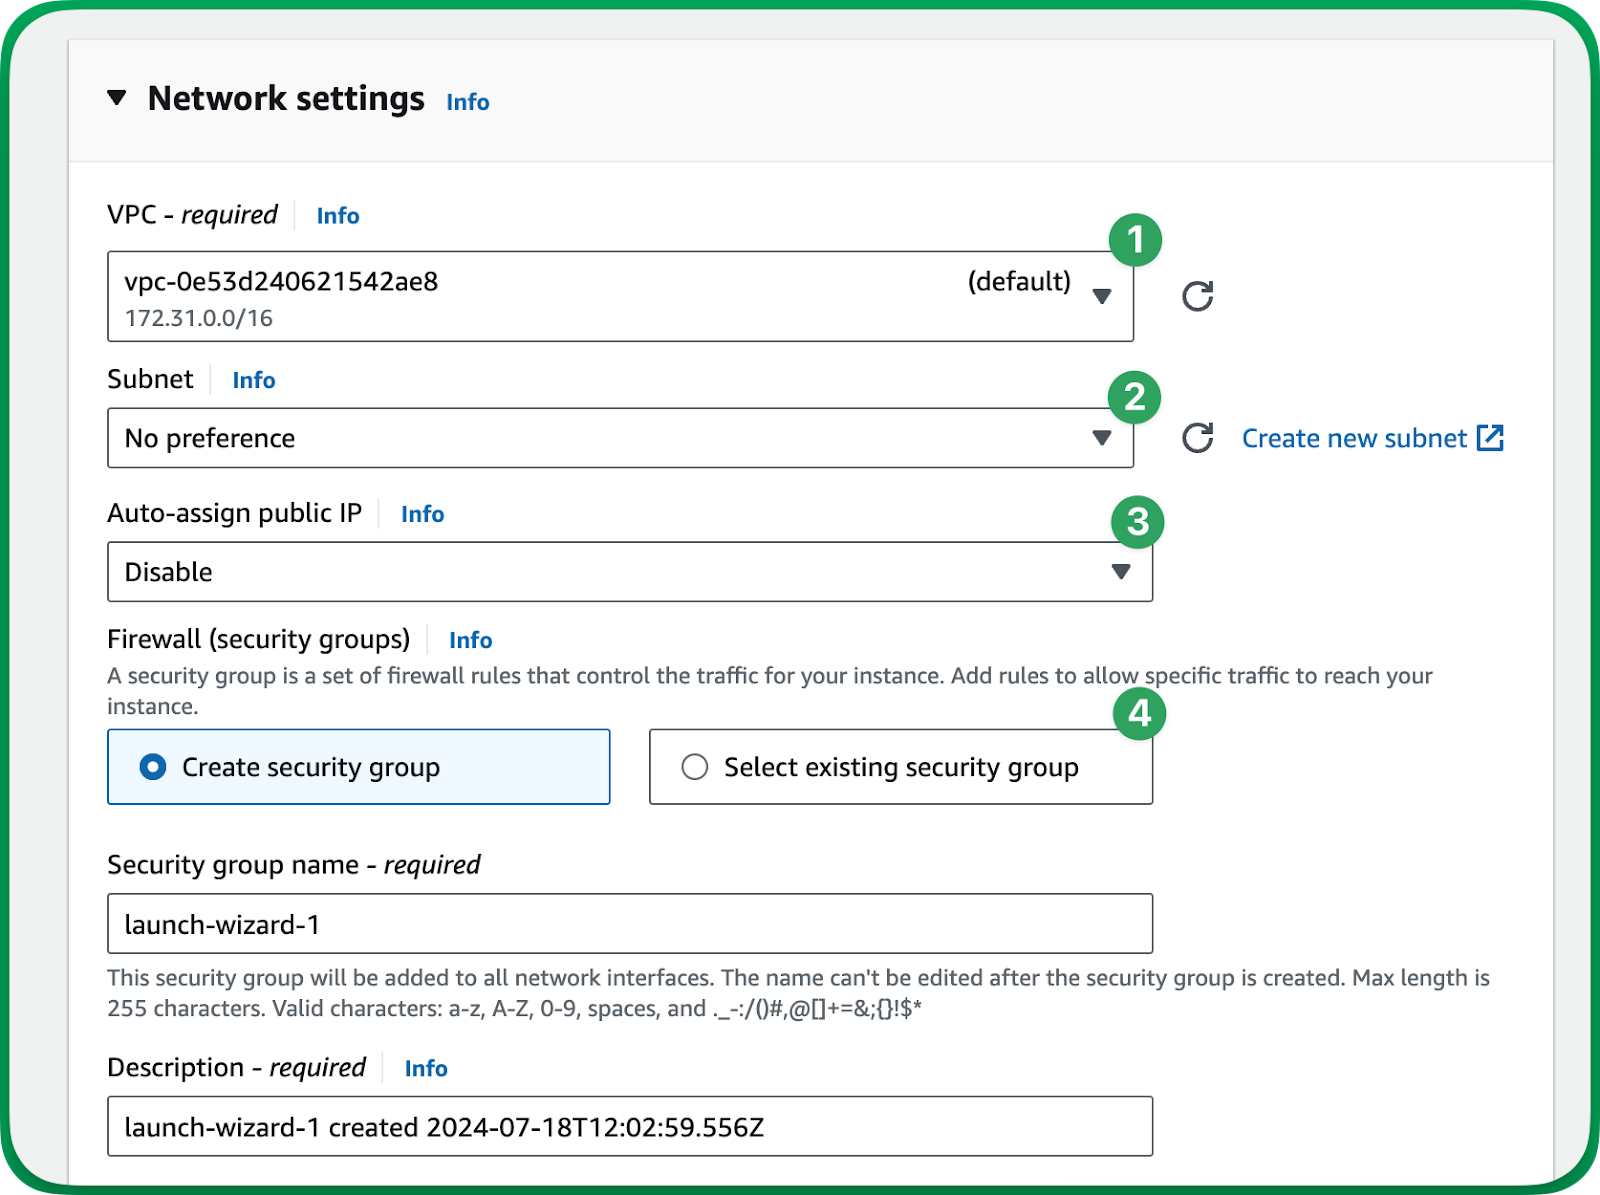
Note
The security group you select should allow traffic between the bird and the networks you want to monitor. Exposing your instance to the public internet will produce lots of noise. We recommend not opening up ports to 0.0.0.0/0.
Step 11: Launch the EC2 instance
Click on Launch instance.

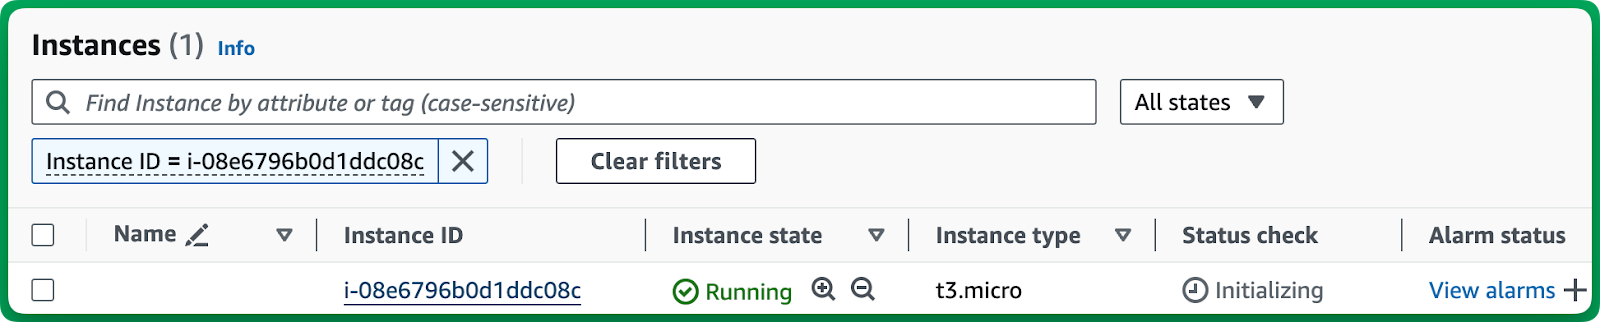
Step 12: Verify that your instance launched successfully
Your instance has been launched.
If the launch process returns an error regarding accepting terms, this page describes the steps you need to take.

Step 13: Wait for instance initialisation
Your instance is busy initialising.
The initialisation process of the VM will normally take around 2-3 minutes, and then you should see it pop up in your Console to be commissioned — as seen in step 14 below.
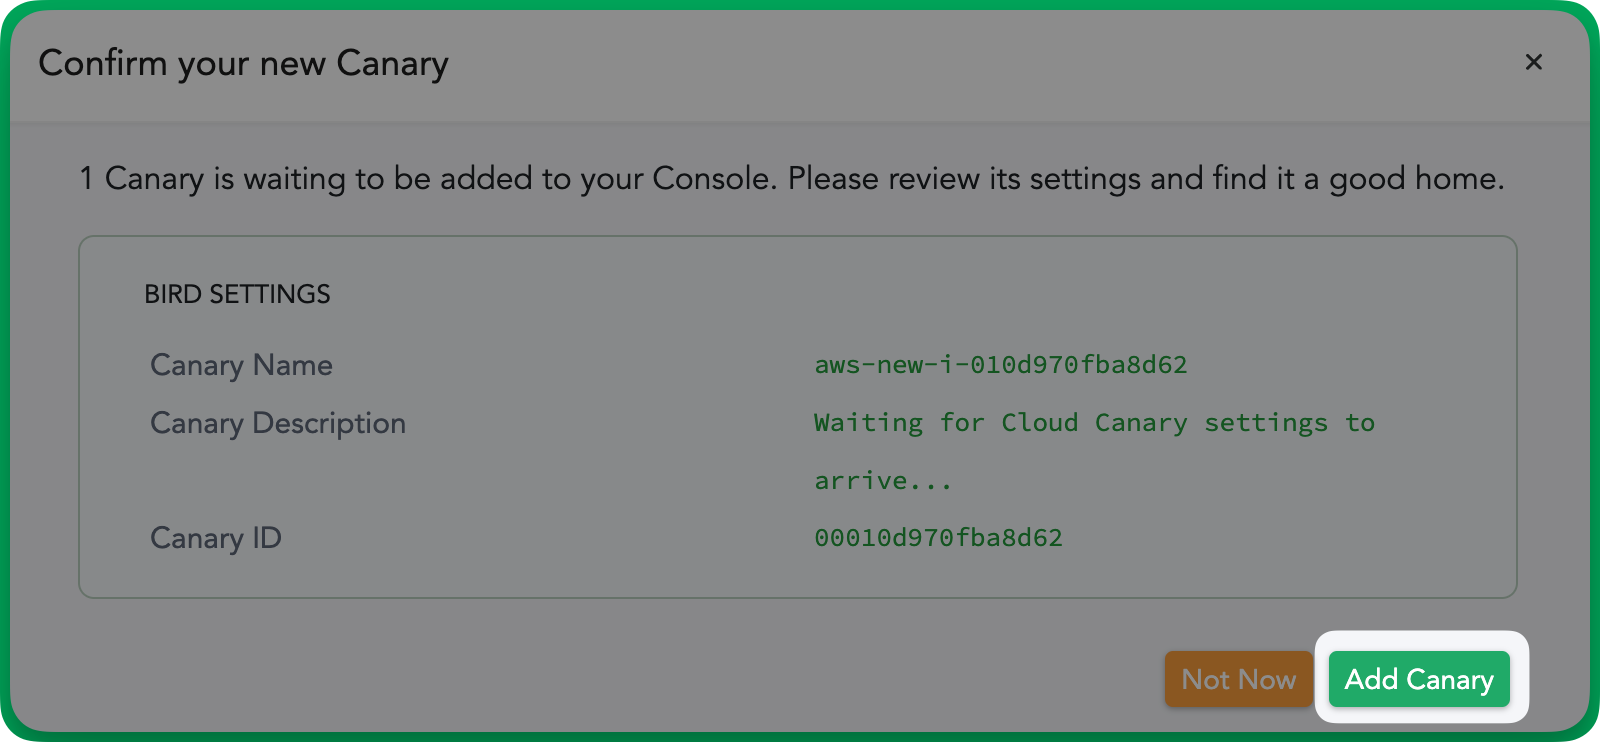
Step 14: Confirm and add Canary to your Console
On your Console, you should see a pop-up to confirm your new Canary.
Click Add Canary to commission the Canary.
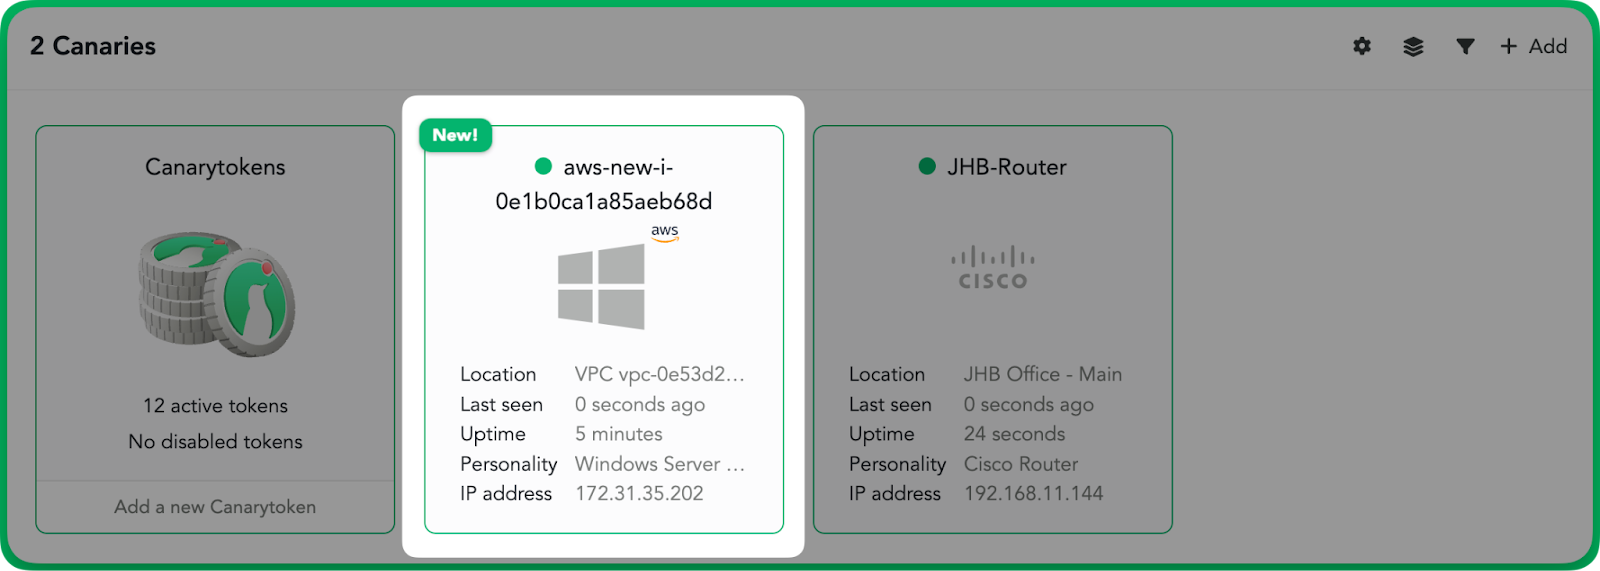
Step 15: Manage your Canary
Your EC2 Canary will boot and connect back to your Console.
Note
Your Canary will connect to your Console running a Windows 2019 configuration with default services on it — you can reconfigure the Canary using the remote management — Guide found here.
Costs per EC2 Cloud Canary
The AWS Birds run on a t3.micro, and depending on the regions, the estimated cost would be $5 to $8 per month.
- Set Location Type to AWS Regions
- Set Region to the region you're running your Canary in — note we've selected US East (Ohio)
- Set the Operating system to Linux — note this should be the default
- Type t3.micro in the search bar to quickly find the running costs
- The hourly costs are shown here and can be multiplied by 730 hours in a month.
EC2 Cloud Canary permissions
We have crafted the EC2 Bird launch experience to be as seamless as possible.
For environments looking to set up a service account with least privilege to deploy EC2 Canaries, the following permissions are required to launch an instance.
These can be further limited to specific resources if you are aware of those ahead of time.
Permissions required role:
{
	"Version": "2012-10-17",
	"Statement": [
		{
			"Effect": "Allow",
			"Action": [
				"ec2:CreateTags",
				"ec2:RunInstances",
				"ec2:DescribeImages",
				"ec2:DescribeInstances",
				"ec2:DescribeInstanceStatus",
				"ec2:DescribeInstanceTypes",
				"ec2:DescribeVpcs",
				"ec2:DescribeSubnets",
				"ec2:DescribeSecurityGroups",
				"ec2:DescribeKeyPairs",
				"ec2:GetSecurityGroupsForVpc"
			],
			"Resource": "*"
		}
	]
}
I can't find my shared AMI
The Canary AMIs are unique per region and per account / AWS ID. This means that we'll need to share the AMIs with you in order for you to access and launch them. Your AMI can be found by either following the link from your Console UI, as shown below:
Alternatively, you can head over to your AMI Catalogue here, and navigate to AMI's shared with you.
If the AMI is still not visible to you, and you're receiving the "AMI X is not valid" error, you may be in the incorrect region, or a different AWS ID than what we've previously shared with you.
If you are using a new AWS account ID which we haven't shared to just yet, feel free to reach out here to gain access to the AMI.