Enable Single SignOn from Active Directory Federation Services to your Canary Console with these steps.
Step 1: Log in and Copy SAML Parameters
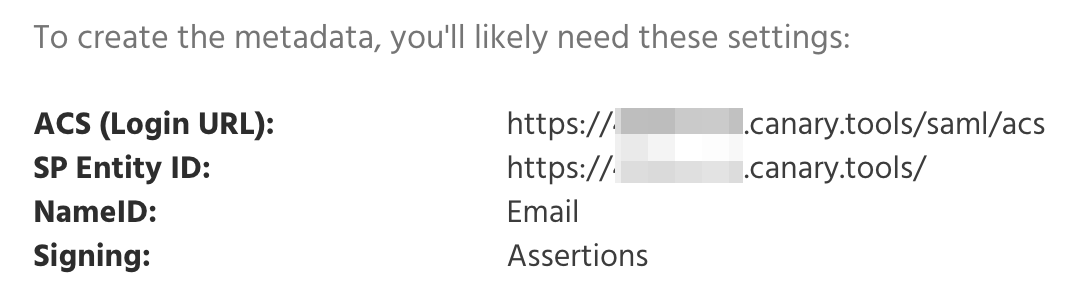
Sign in to your Canary Console, navigate to Setup in the top navigation bar, then select SAML from the left-hand menu to access and copy your SAML parameters.
Step 2: Configure ADFS relying party trust
1. In AD FS Management right click on Relying Party Trusts then Add Relying Part Trust:
2. When the wizard starts, select the Claims aware radio button:
3. Select the Enter data about the relying party manually radio button:
4. Specify a Display name you would want to appear on the ADFS login page:
5. Click Browse if you require token encryption using a certificate other than the default specified in ADFS:
6. Select the Enable support for the SAML 2.0 WebSSO protocol check box, then enter the ACS (Login URL) from the SAML parameters in Step 1:
7. Enter the SP Entity ID from the SAML parameters in Step 1 in the Relying part trust identifier text box:
8. Select an applicable Access Control Policy:
9. Verify the configuration on the Ready to Add Trust Window:
10. Select the "Configure claims issuance policy for this application" checkbox:
11. Configure a SAML logout URL by adding an endpoint to the newly created Relying Party Trust. Open the properties of Canary Console and click Add SAML under the Endpoints tab.
12. Select SAML Logout under the Endpoint type and set the URL to:
https://%yourADFSserver%/adfs/ls/?wa=wsignout1.0
Step 3: Configure ADFS claims issuance policy
After the wizard in Step 2 completes, the Edit Claim Issuance Policy for Canary Console opens. Click Add Rule:
Another Add Transform Claim Rule Wizard opens. Select Send LDAP Attributes as Claims as the Claim rule template:
Enter Attributes into the Claim rule name text box, then select Active Directory from the Attribute Store drop-down. Select E-Mail-Addresses for the LDAP Attribute and Name ID for the Outgoing Claim Type within the Mapping of LDAP Attributes to going claim types table:
Step 4: Modify the Active Directory LDAP Attribute
Step 5: Download the SAML Metadata
Download your FederationMetadata.xml from:
https://%yourADFSserver%/FederationMetadata/2007-06/FederationMetadata.xml
Step 6: Send us the SAML Metadata
Please send the SAML metadata file from Step 5 to us via a support ticket here,and we will configure your Console with the IdP metadata and confirm when SAML support is fully set up.
Step 7: Test login from both the Console and ADFS
Navigate to https://%yourADFSserver%/adfs/ls/idpinitiatedsignon. Select Canary Console:
Authenticate with your Active Directory credentials:
After successful authentication, you will be redirected to your Console:
From the Console you'll know it's working when you see your Console Login page show a Login with SSO button:
Click the Login with SSO button to initiate the SSO login. We default to the initial login being IdP-initiated, and after that, the same browser can use SP-initiated authentication without issue. This is to hide the fact that the Console belongs to your org.